Does this scenario ring a bell?
Price ascends past a retracement level, forms a pin bar between the levels – denying your entry – and then abruptly reverses, causing you to miss a profitable trade.
Or perhaps this one…
You initiate a trade after observing an engulf form at a Fibonacci level.
But soon after, price spikes higher, eliminates your stop, and reverses, leading to a loss and a missed opportunity for a lucrative trade.
This pattern is all too familiar to many of us.
But there’s a lesser-known technique that can prevent such instances…
A Better Way Of Trading Retracements
Take a look at the image below…

This perfectly illustrates the scenario we discussed.
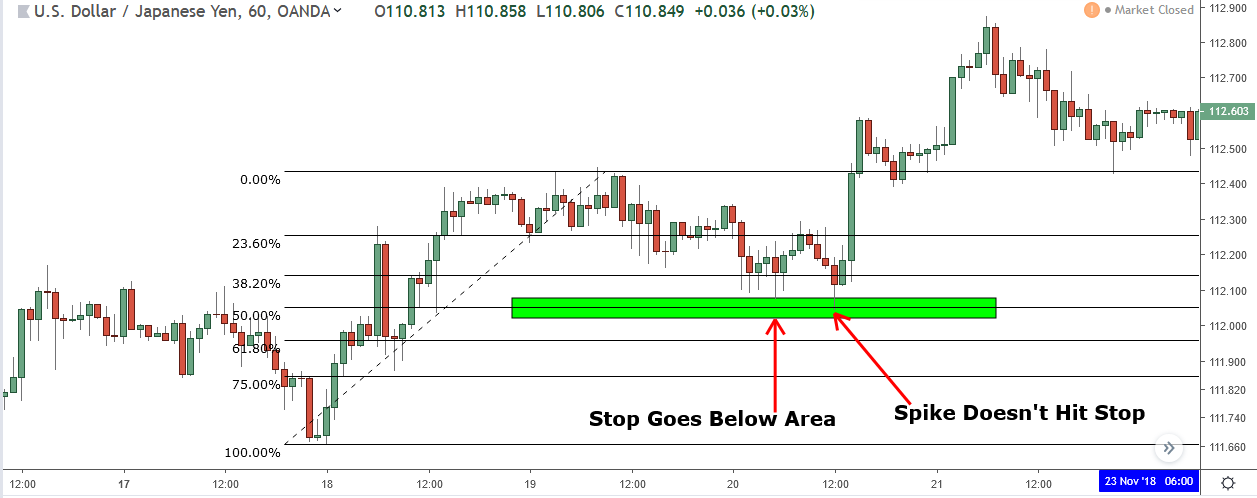
Price retreats to the 38.2% level, forms a bullish pin bar (a cue to enter), then plunges below the pin’s low – triggering your stop – before finally bouncing back and climbing.
A common tale, on a different day.
Now, let’s examine how this unfolds with a zone marked around the level…

It appears identical, doesn’t it?
Despite the pin’s formation, price still dives below the low… the only difference is the dip grazes the area, which doesn’t alter the trade’s result.
So what’s the significance of the area?
Here’s the catch…
By placing the stop below the area, rather than at the pin’s low, the decline won’t trigger the stop, ensuring…
You stay in the trade and catch the reversal.
Thus, by marking an area around a level and using it as the reference for your stop, you can dodge being ousted from successful pull-back trades due to arbitrary price spikes.
Quite useful, isn’t it?
I’m sure you’ve encountered this situation more than once…

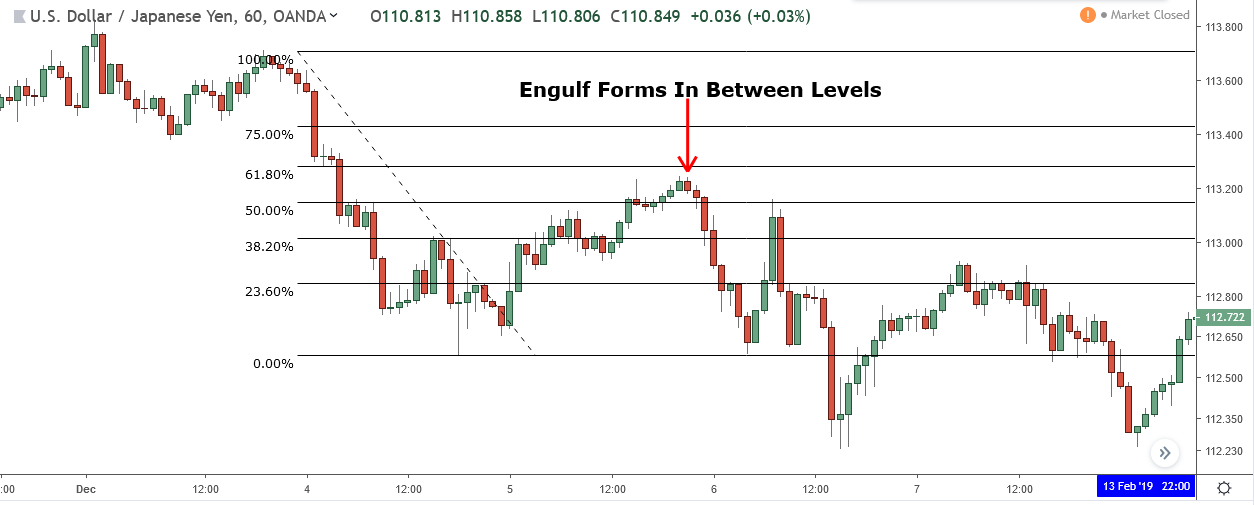
Price often retraces, but instead of forming a pattern at a Fibonacci level—a prerequisite for a valid signal—it often forms in between.
This phenomenon can lead you to miss out on potentially successful trades, a problem perhaps even more prevalent than having a spike hit your stop.
Using zones can rectify this issue.

For example, if I mark a zone around the 61.8% level and the engulf touches the zone, it provides a valid entry signal.
This demonstrates another way in which zones can enhance your trading.
Don’t Mark Retracement Zones The Wrong Way
Marking retracement zones is relatively straightforward—you just place a rectangle on each of the retracement levels.
However, there’s a correct and incorrect way to do this.

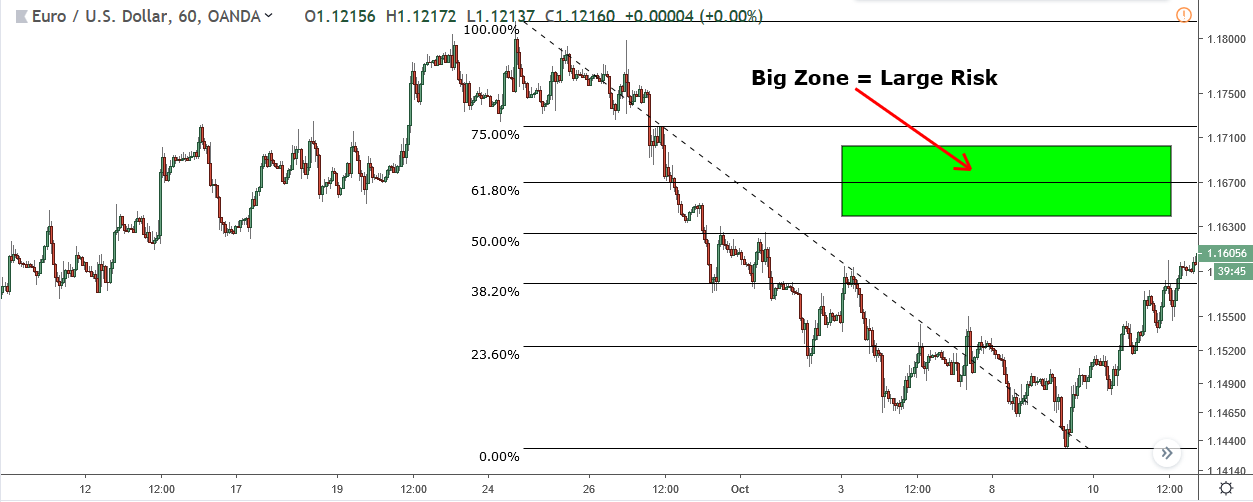
Placing a rectangle haphazardly over the zones can occasionally lead to successful trades, but if the zone is larger or smaller than it should be, your risk could be compromised. This could result in you risking (and potentially losing) more or less than necessary.

The correct method involves marking the zone so each edge sits approximately a quarter of the way above and below the Fibonacci level.
Although not an exact science, this approach creates a reasonably sized zone and leaves a small gap between zones, reducing risk when placing stop orders.
The Bottom Line
Stay tuned for more posts on Fibonacci-related topics.
For now, you’ll find any pertinent links below.